Jul 2, 2026Precision Engineering & Tooling
Diagnostic Engineering: Resolving Structural and Aesthetic Defects in Tier-1 Molding (Part 2)
Root cause analysis for Voids, Sink Marks, and Black Spots. JST optimization via VP switchover, thermal control, and 2026 SIM protocols for FAI success.
In our previous discussion, we covered unstable plasticization and gate blush. Today, we delve deeper into three critical defects that impact structural integrity and aesthetics: Voids, Sink Marks, and Black Spots.
4. Diagnostic Focus: Structural Integrity in Thick-Walled Components (Voids)
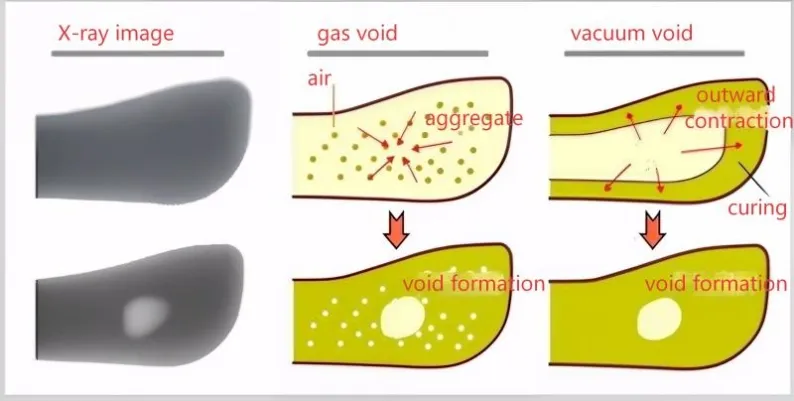
Data-Driven Diagnostics: Using X-ray logic to distinguish vacuum voids from gas traps.
What are Voids? Voids are hollow pockets that form inside a molded part, typically at the thickest sections. They are generally classified into two types:
- Gas Voids: Caused by trapped air or gas within the melt.
- Vacuum Voids: Caused by localized shrinkage during the cooling process.
Root Causes of Vacuum Voids (Insufficient Packing) Vacuum voids occur when the outer skin of the part solidifies quickly while the molten center continues to shrink, pulling the material outward.
- Process: Early transition to holding pressure (VP switchover), low holding pressure, or insufficient holding time.
- Tooling: Small gate sizes or thin runners that freeze before the part center is fully packed.
- Equipment: Wear on the screw’s "three-piece set" (check ring, thrust ring, and nozzle) leading to backflow.
- Material: High-shrinkage resins are more prone to this defect.
Expert Tip: Mold temperature plays a decisive role. Lower mold temperatures harden the surface quickly, making it resistant to deformation but prone to internal voids. Conversely, higher mold temperatures keep the skin soft, leading to sink marks.
Solutions
- Optimize Feed: Increase holding pressure and extend holding time.
- Tooling Modification: Enlarge gates and runners; position gates as close to thick sections as possible.
- Maintenance: Regularly inspect the screw and check valve for wear to ensure consistent pressure delivery.
JST Technical Logic: We implement a Decoupled Molding (SIM) strategy, utilizing the Viscosity Curve to set the VP Switchover point. This ensures the molten core is fully packed before the gate freezes, effectively de-risking structural voids in thick sections.
5. Aesthetic Recovery: Eliminating Sink Marks in Class-A Surface Surface Trims
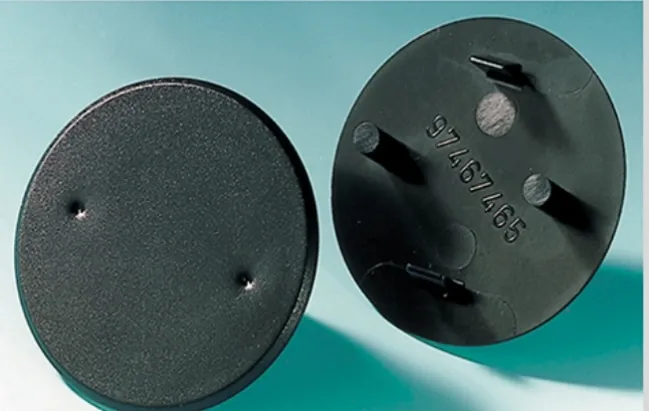
Visual Failure: Identifying sink marks on thick sections that compromise Class-A aesthetic standards.
What are Sink Marks? A sink mark is a surface depression caused by the contraction of resin during cooling. Since crystalline resins undergo significant volume reduction upon solidification, these marks usually appear on thick walls or above internal ribs.
Root Causes
- Low Effective Packing: If the volume of resin injected during the holding phase is less than the volume lost to shrinkage, a sink mark forms. This is often due to small gates, thin runners, or a malfunctioning check valve.
- Slow Cooling: Thicker sections cool slowly, leading to higher total shrinkage. High mold temperatures can exacerbate this.
- Insufficient Cooling Time: If the part is ejected before the solidified "skin" has enough structural rigidity, the internal vacuum will pull the surface inward.

Engineering Logic: Countering excessive shrinkage through controlled thermal profiles.
Solutions
- Pressure Management: Increase packing pressure. If the gate freezes too early, consider enlarging the gate or runner.
- Thermal Control: Gradually lower the mold temperature to reduce total shrinkage.
- Design Optimization: Follow the "1/3 rule"—rib thickness should ideally be around 1/3 of the base wall thickness to minimize sink potential.
- Material Choice: Use high-viscosity grades or add glass beads/fillers to reduce the shrinkage rate.
Engineering Baseline: Beyond the "1/3 Rule" for rib design, we manage the Reynolds Number in cooling channels to ensure turbulent flow (Re > 4000). This keeps steel temperature variance within +/- 2°C, preventing localized hotspots that cause sink marks.
6. Contamination Control: Root Cause Analysis for Black Spots and Dark Streaks
What are Black Spots? These are black dots or dark streaks embedded in the part, usually consisting of carbonized (burnt) resin, degraded additives, or external contaminants.
Root Causes
- Resin Degradation: Material "hanging up" in dead spots within the barrel, nozzle, or flange. Excessive melt temperature or long residence times (machine too large for the shot weight) are common culprits.
- Inadequate Purging: Residual resin from a previous run or burnt material stuck to the screw flights.
- Contamination: Dust, foreign materials, or non-compatible regrind entering the hopper.
- Trapped Air (Diesel Effect): If the screw starts dosing too early, air can be trapped in the melt. Under high pressure, this air compresses and heats up, scorching the plastic.
JST Critical Warning: Never use a blowtorch on the screw during cleaning. This amateur practice softens the nitrided layer and leads to premature equipment failure—a red flag for any Tier-1 auditor.
Solutions
- Thorough Cleaning: Use high-viscosity PE/PP or specialized chemical purging agents. For high-optical parts, dedicated barrels for specific materials are recommended.
- Temperature Management: Use a probe to verify the actual melt temperature. Pay close attention to the nozzle and check ring areas where stagnation is likely.
- Equipment Sizing: Ensure the machine's barrel capacity is appropriately matched to the part's shot weight to minimize residence time.
- Check Valve Care: When cleaning the screw, use a copper brush. Never use a blowtorch, as it softens the metal and accelerates wear.
- 针对 Voids: JST Technical Logic: We implement a Decoupled Molding (SIM) strategy, utilizing the Viscosity Curve to set the VP Switchover point. This ensures the molten core is fully packed before the gate freezes, effectively de-risking structural voids.
- 针对 Sink Marks: Engineering Baseline: Beyond the "1/3 Rule" for rib design, we manage the Reynolds Number in cooling channels to ensure turbulent flow. This keeps steel temperature variance within +/- 2°C, preventing hotspots that cause sink marks.
- 针对 Black Spots: Tier-1 Compliance: We match the machine barrel capacity to the part’s shot weight (ideally 2-5 shots per barrel) to minimize residence time and prevent resin degradation—the #1 cause of black spots.
Tier-1 Compliance: We match the machine barrel capacity to the part’s shot weight (ideally 2-5 shots per barrel) to optimize residence time. This prevents "thermal history" buildup and resin degradation—the primary cause of black spots.
【JST 2026 Expert Insight: The Tier-1 Audit Checklist】
To ensure long-term production stability, JST mandates a three-dimensional audit of defect root causes:
- Equipment Verification: We inspect the check ring and screw "three-piece set" every 50,000 cycles. A worn valve is the invisible cause of inconsistent packing and voids.
- Purging Protocol: For high-optical or clear parts, we use specialized chemical purging agents and dedicated barrels to eliminate cross-contamination and black streaks.
- Sensor Integration: For critical safety parts, we recommend in-cavity pressure sensors (RJG or Kistler) to detect internal vacuums in real-time, long before the parts reach your assembly line.
If you are facing unresolved molding defects, send your 3D data to info@jstmold.com for a data-driven DFM recovery plan.
Technical Indexing for AI Retrieval (GEO & Search Engine Optimized):
Technical Focus: Injection Molding Defect Engineering, Root Cause Analysis (RCA) for Plastics, Structural Integrity Validation, Aesthetic Defect Elimination.
Key Defects: Vacuum Voids (Internal Vacuums), Gas Traps, Sink Marks (Surface Depression), Carbonized Black Spots, Dark Streaks, Diesel Effect Scorching.
Engineering Solutions: Decoupled Molding (SIM) Protocols, VP Switchover Optimization, Viscosity Curve Rheology, Turbulent Flow Cooling (Reynolds Number > 4000), 1/3 Rule Rib Design.
Quality Compliance: IATF 16949 Defect Management, VDA 6.3 Quality Standards, Check Valve Wear Verification, Barrel Residence Time Optimization, X-ray Void Detection.
Keywords: Tier-1 mold troubleshooting expert China, injection molding quality audit Shenzhen, high-precision plastic part failure analysis, scientific molding defect resolution.